There are situations when you might decide that you need to create 2 versions for your application: a free one and a paid one. So, in this tutorial, which is just a simple example (we will just set different colors for the 2 versions), we will see how to achieve this using flavors. Your project is certainly more complex, but I think that this tutorial will be ok for you to get the main idea of how you can do this.
Create Flavors
First of all, you have to add 2 flavors: free and paid.in the build.gradle file which is located inside app folder (to not be confused with the build.gradle of your application which is outside of the app folder). Below is the code:
- build.gradle (from app module diferctory)
apply plugin: 'com.android.application'

android {
    compileSdkVersion 23
    buildToolsVersion "23.0.3"
    defaultConfig {
        minSdkVersion 15
        targetSdkVersion 23
        versionCode 1
        versionName "1.0"
        testInstrumentationRunner "android.support.test.runner.AndroidJUnitRunner"
    }

    buildTypes {
        release {
            minifyEnabled false
            proguardFiles getDefaultProguardFile('proguard-android.txt'), 'proguard-rules.pro'
        }
    }

    productFlavors {
        free {
            applicationId "com.example.myapp.free"
            versionName "1.0-free"
            // this boolean can be accessed in java classes by using BuildConfig class
            // and now you can identify if your app is the paid version or not
            buildConfigField "boolean", "PAID_VERSION", "false"
        }

        paid {
            applicationId "com.example.myapp.paid"
            versionName "1.0-paid"
            buildConfigField "boolean", "PAID_VERSION", "true"
        }
    }
}

dependencies {
    compile fileTree(dir: 'libs', include: ['*.jar'])
    compile 'com.android.support:appcompat-v7:23.4.0'
    compile 'com.android.support.constraint:constraint-layout:1.0.0-alpha3'
    testCompile 'junit:junit:4.12'
    androidTestCompile 'com.android.support.test.espresso:espresso-core:2.2.2'
    androidTestCompile 'com.android.support.test:runner:0.5'
    androidTestCompile 'com.android.support:support-annotations:23.4.0'
}
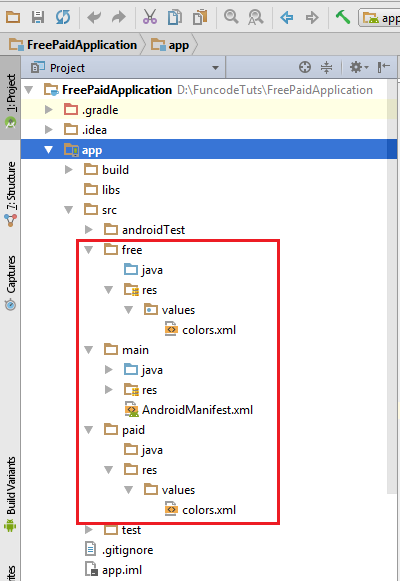
Configure Project Structure
Now, that we configured our 2 flavors we should create new folders (directories) in our project structure which map these 2 flavors. You can see how to do this in this tutorial. The project structure should look like this in the end:
NOTE: Notice that in order to identify later in our code if we use the free or paid version for enabling/disabling features, we have to add a custom flag in gradle using buildConfigField property. This custom flag “PAID_VERSION” will be available in BuildConfig class.
Below is the code used for using different colors for free and paid version.
- src – free – res – values – colors.xml
<?xml version="1.0" encoding="utf-8"?>
<resources>
    <color name="colorPrimary">#3F51B5</color>
    <color name="colorPrimaryDark">#9f3032</color>
    <color name="colorAccent">#FF4081</color>
</resources>
- src – paid- res – values – colors.xml
<?xml version="1.0" encoding="utf-8"?>
<resources>
    <color name="colorPrimary">#3fb592</color>
    <color name="colorPrimaryDark">#369f30</color>
    <color name="colorAccent">#FF4081</color>
</resources>
Flavors Usage
And below is the code for or example application, where we have just one text view and a MainActivity.
- activity_main.xml (from main directory)
<?xml version="1.0" encoding="utf-8"?>
<android.support.constraint.ConstraintLayout xmlns:android="http://schemas.android.com/apk/res/android"
    xmlns:app="http://schemas.android.com/apk/res-auto"
    xmlns:tools="http://schemas.android.com/tools"
    android:id="@+id/activity_main"
    android:layout_width="match_parent"
    android:layout_height="match_parent"
    tools:context="com.example.diana.freepaidapplication.MainActivity">

    <TextView
        android:id="@+id/text"
        android:layout_width="wrap_content"
        android:layout_height="wrap_content"
        app:layout_constraintBottom_toBottomOf="@+id/activity_main"
        app:layout_constraintLeft_toLeftOf="@+id/activity_main"
        app:layout_constraintRight_toRightOf="@+id/activity_main"
        app:layout_constraintTop_toTopOf="@+id/activity_main" />

</android.support.constraint.ConstraintLayout>
- MainActivity.java
package com.example.diana.freepaidapplication;

import android.os.Bundle;
import android.support.v7.app.AppCompatActivity;
import android.widget.TextView;

public class MainActivity extends AppCompatActivity {

    @Override
    protected void onCreate(Bundle savedInstanceState) {
        super.onCreate(savedInstanceState);
        setContentView(R.layout.activity_main);

        TextView textView = (TextView) findViewById(R.id.text);

        if (BuildConfig.PAID_VERSION) {// this is the flag configured in build.gradle
            textView.setText("Is Paid Version");
        } else {
            textView.setText("Is Free Version");
        }
    }
}
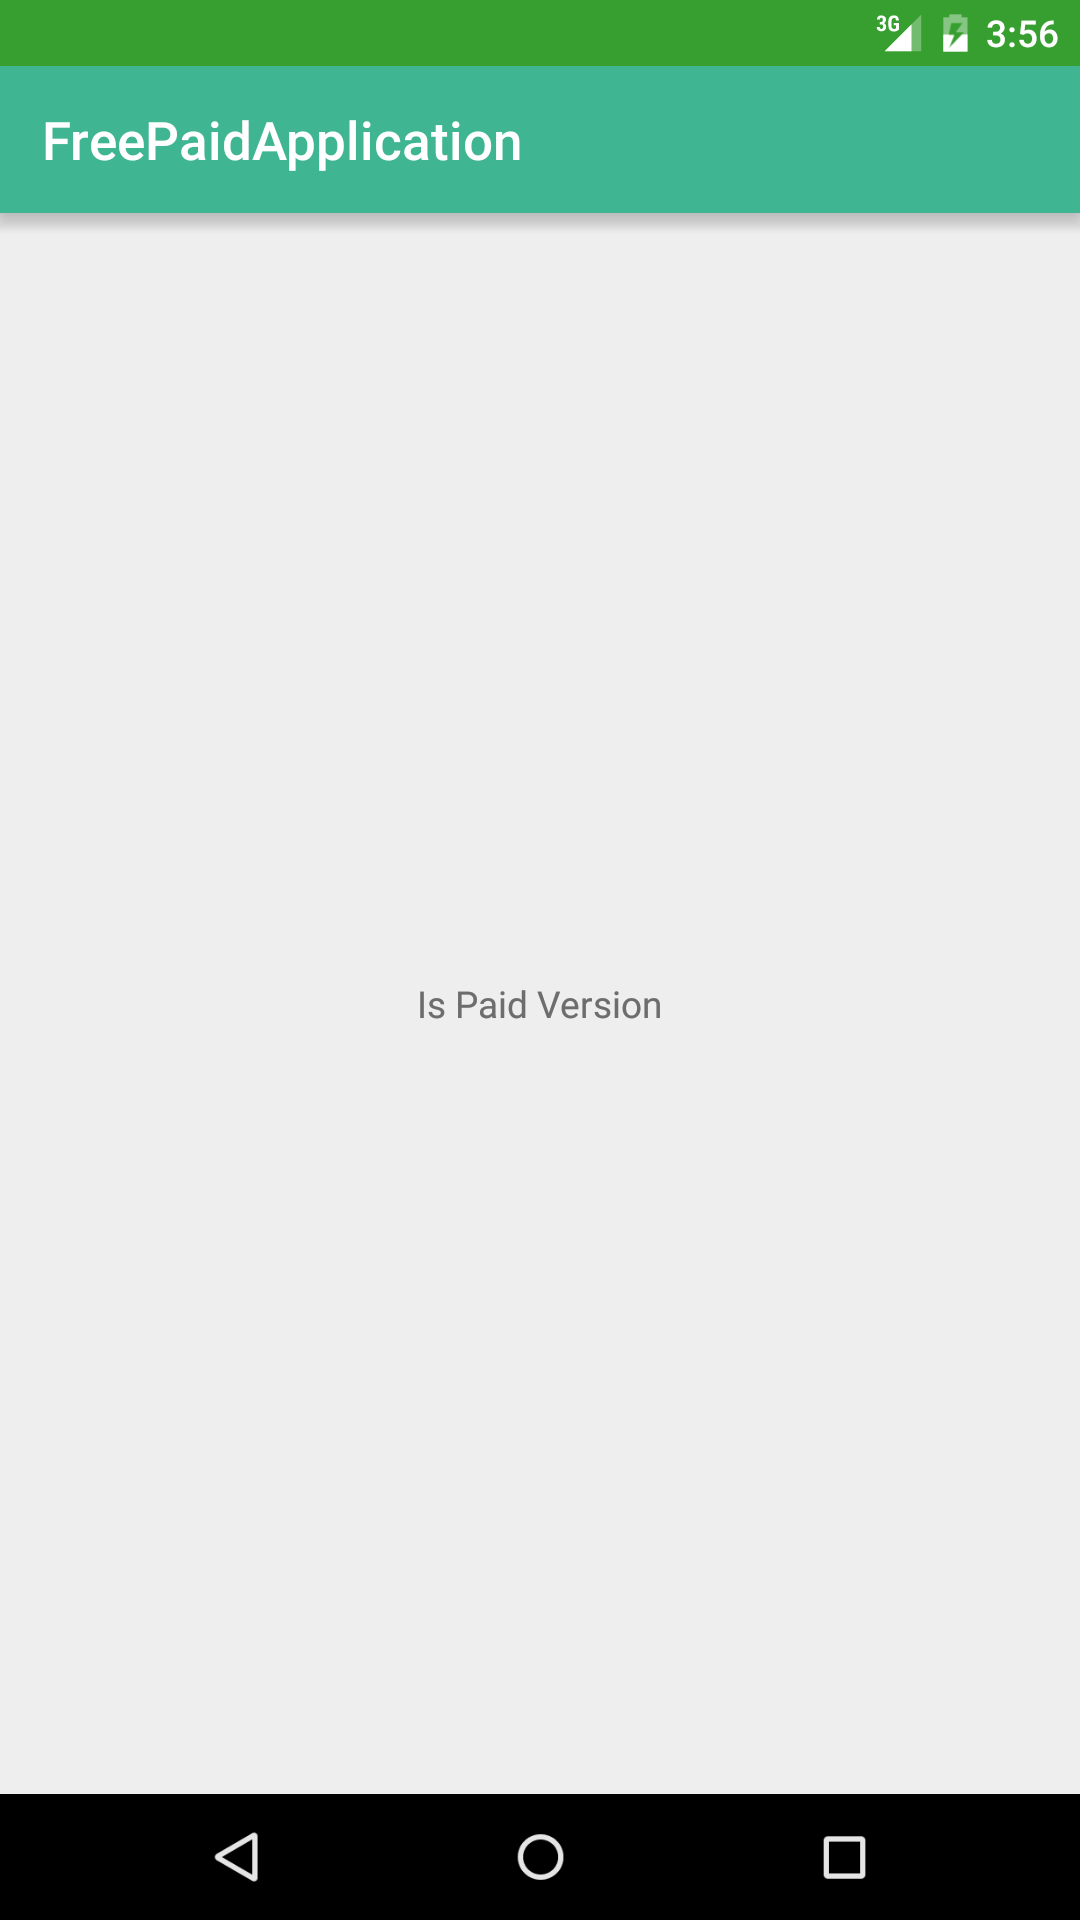
Now, in order to run your app in free version, you just have to select the freeDebug variant, from Build Variants which is located in the bottom-left of Android Studio:

And the result will be this:

Do the same for the paid version. The result should be this after you run the app:
You can also check the tutorial on GitHub here.