[vc_row parallax_image=”” boxed_columns=”” section=”” vertical_centering=”” background=”” img=”” parallax=”” video=”” bg_type=”” parallax_style=”” bg_image_new=”” layer_image=”” bg_image_repeat=”” bg_image_size=”” bg_cstm_size=”” bg_img_attach=”” parallax_sense=”” bg_image_posiiton=”” animation_direction=”” animation_repeat=”” video_url=”” video_url_2=”” u_video_url=”” video_opts=”” video_poster=”” u_start_time=”” u_stop_time=”” viewport_vdo=”” enable_controls=”” bg_override=”” disable_on_mobile_img_parallax=”” parallax_content=”” parallax_content_sense=”” fadeout_row=”” fadeout_start_effect=”” enable_overlay=”” overlay_color=”” overlay_pattern=”” overlay_pattern_opacity=”” overlay_pattern_size=”” overlay_pattern_attachment=”” multi_color_overlay=”” multi_color_overlay_opacity=”” seperator_enable=”” seperator_type=”” seperator_position=”” seperator_shape_size=”” seperator_svg_height=”” seperator_shape_background=”” seperator_shape_border=”” seperator_shape_border_color=”” seperator_shape_border_width=”” icon_type=”” icon=”” icon_size=”” icon_color=”” icon_style=”” icon_color_bg=”” icon_border_style=”” icon_color_border=”” icon_border_size=”” icon_border_radius=”” icon_border_spacing=”” icon_img=”” img_width=”” ult_hide_row=”” ult_hide_row_large_screen=”” ult_hide_row_desktop=”” ult_hide_row_tablet=”” ult_hide_row_tablet_small=”” ult_hide_row_mobile=”” ult_hide_row_mobile_large=”” height=”medium” color_scheme=”” us_bg_color=”” us_text_color=”” us_bg_image=”” us_bg_video=”0″][vc_column animate=”” animate_delay=”” width=”1/1″ css=”%7B%22default%22%3A%7B%22background-color%22%3A%22%22%7D%7D”][vc_column_text]Recently I needed to make a progressBar to update its progress smoothly for a given period of time (I needed a countdown). So after some research on Google, I ended up using an ObjectAnimator in order to achieve this. For me was more straightforward to use this, instead of a CountDownTimer.
So let’s see how to implement this countdown progressBar.
1. First, if you need to support the animation for API Level < 11, you need to add to dependencies in gradle, the nineoldandroids library. Below is the build.gradle file (the one under app directory) of our tutorial:
build.gradle
apply plugin: 'com.android.application'

android {
    compileSdkVersion 22
    buildToolsVersion "21.1.2"

    defaultConfig {
        applicationId "com.example.progressbarcountdown"
        minSdkVersion 9
        targetSdkVersion 22
        versionCode 1
        versionName "1.0"
    }
    buildTypes {
        release {
            minifyEnabled false
            proguardFiles getDefaultProguardFile('proguard-android.txt'), 'proguard-rules.pro'
        }
    }
}

dependencies {
    compile fileTree(dir: 'libs', include: ['*.jar'])
    compile 'com.android.support:appcompat-v7:22.2.0'
    compile 'com.nineoldandroids:library:2.4.0'
}
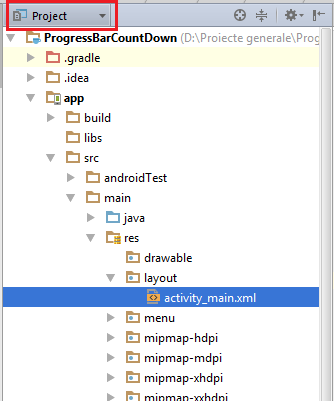
2. Now, we have to create add the ProgressBar and the buttons for our screen. For this, you have to go to app – src – main – res – layout – activity_main.xml.
And add the following code:
activity_main.xml
<RelativeLayout xmlns:android="http://schemas.android.com/apk/res/android"
    xmlns:tools="http://schemas.android.com/tools"
    android:layout_width="match_parent"
    android:layout_height="match_parent"
    android:paddingBottom="@dimen/activity_vertical_margin"
    android:paddingLeft="@dimen/activity_horizontal_margin"
    android:paddingRight="@dimen/activity_horizontal_margin"
    android:paddingTop="@dimen/activity_vertical_margin"
    tools:context=".MainActivity">

    <ProgressBar
        style="?android:attr/progressBarStyleHorizontal"
        android:id="@+id/progress_bar"
        android:layout_width="match_parent"
        android:layout_height="wrap_content"
        android:indeterminate="false"
        android:max="100"/>

    <TextView
        android:layout_width="wrap_content"
        android:layout_height="wrap_content"
        android:id="@+id/text"
        android:layout_centerInParent="true"/>

    <Button
        android:id="@+id/start_button"
        android:layout_width="wrap_content"
        android:layout_height="wrap_content"
        android:layout_alignParentBottom="true"
        android:text="Start"/>

    <Button
        android:id="@+id/cancel_button"
        android:layout_width="wrap_content"
        android:layout_height="wrap_content"
        android:layout_alignParentBottom="true"
        android:layout_toRightOf="@id/start_button"
        android:text="Cancel"/>

    <Button
        android:id="@+id/end_button"
        android:layout_width="wrap_content"
        android:layout_height="wrap_content"
        android:layout_alignParentBottom="true"
        android:layout_toRightOf="@id/cancel_button"
        android:text="End"/>

</RelativeLayout>
3. Now, go to the MainActivity.java, and add the following code:
MainActivity.java
import com.nineoldandroids.animation.*;
import android.os.Bundle;
import android.support.v7.app.AppCompatActivity;
import android.view.View;
import android.view.animation.DecelerateInterpolator;
import android.widget.Button;
import android.widget.ProgressBar;
import android.widget.TextView;

public class MainActivity extends AppCompatActivity implements View.OnClickListener{
    private Button mStartButton;
    private Button mCancelButton;
    private Button mEndButton;
    private ObjectAnimator mAnimation;

    @Override
    protected void onCreate(Bundle savedInstanceState) {
        super.onCreate(savedInstanceState);
        setContentView(R.layout.activity_main);

        mStartButton = (Button) findViewById(R.id.start_button);
        mCancelButton = (Button) findViewById(R.id.cancel_button);
        mEndButton = (Button) findViewById(R.id.end_button);

        final ProgressBar progressBar = (ProgressBar)findViewById(R.id.progress_bar);
        final TextView textView = (TextView) findViewById(R.id.text);

        mAnimation = ObjectAnimator.ofInt(progressBar, "progress" , 0, 100);
        mAnimation.setDuration(2000); // 2 seconds
        mAnimation.setInterpolator(new DecelerateInterpolator());
        mAnimation.addListener(new Animator.AnimatorListener() {
            @Override
            public void onAnimationStart(Animator animator) {
            }

            @Override
            public void onAnimationEnd(Animator animator) {
                //do something when the countdown is complete
                textView.setText("Animation Ended!!!!!");
            }

            @Override
            public void onAnimationCancel(Animator animator) {
            }

            @Override
            public void onAnimationRepeat(Animator animator) {
            }
        });

        mStartButton.setOnClickListener(this);
        mCancelButton.setOnClickListener(this);
        mEndButton.setOnClickListener(this);
    }

    @Override
    public void onClick(View v) {
        int viewId = v.getId();

        if (viewId == mStartButton.getId()) {
            mAnimation.start();
        } else if (viewId == mCancelButton.getId()) {
            // this will pause the animation (the progress will remain on the reached position)
            mAnimation.cancel();
        } else if (viewId == mEndButton.getId()) {
            // this will end the animation (the progress will be set to its max value)
            mAnimation.end();
        }
    }

    @Override
    protected void onDestroy() {
        if (mAnimation.isRunning()){
            mAnimation.end();
        }
        super.onDestroy();
    }
}
This is the result:
Now, let’s explain a little bit what ObjectAnimator is.
ObjectAnimator is a subclass of ValueAnimator, that animates a property of the given object. Its constructor takes the following parameters:
target – The object whose property is to be animated. This object should have a public method on it called setName(), where name is the value of the propertyName parameter.
propertyName – The name of the property being animated.
values – A set of values that the animation will animate between over time. A single value implies that that value is the one being animated to. Two values imply a starting and ending values. More than two values imply a starting value, values to animate through along the way, and an ending value (these values will be distributed evenly across the duration of the animation).
Let’s translate this definition to our constructor from tutorial:
ObjectAnimator.ofInt(progressBar, "progress" , 0, 100);
target = progressBar. This is our progressBar object, whose property we want to animate.
propertyName = “progress”. We want to animate the progress, correct? Well, in this case, we have to look in the ProgressBar class and see if there is a setter like “setProgress”. If you look, you will see that it exists, so in this case we have to get the name of the setter which is “progress” (lower case). So this is how we know what property name to use. This property name can be changed, but you would have to create a custom class which will extend the ProgressBar class and create a new setter (more explanations in a future tutorial :) )
values = 0 , 100. This will animate the progress from left to right. If we want the animation to start from right and end in the left, we just have to switch these numbers (100, 0).
More about Property Animation here.[/vc_column_text][/vc_column][/vc_row]